[Day 29] Google AI Hub - 2

今天要來玩的是AI Hub裡面的Reusing a pipeline component,對Python超不熟的我弄了超久。

這邊會需要run起tensorflow的docker
docker pull tensorflow/tensorflow:latest-py3-jupyter
docker run -it --rm -v $(realpath ~/notebooks):/tf/notebooks -p 8888:8888 --name jupyter tensorflow/tensorflow:latest-py3-jupyter

pipeline component#

首先,我們先透過AI Hub Kubeflow pipeline找到要用的pipeline component,doc文件裡推薦我們找Scikit-learn Trainer
scikit-learning

這邊我們選擇下載component.yaml,因為還沒找到正確的方法使用Copy linkDownload

install kubeflow pipeline sdk#

接著我們照著kubeflow pipeline的教學,逐步安裝SDK。

這裡需要docker exec -it jupyter /bin/bash進入docker shell

1
2
3
4
5
6
7
8
9
10
11
apt-get update; apt-get install -y wget bzip2
wget https://repo.continuum.io/miniconda/Miniconda3-latest-Linux-x86_64.sh
bash Miniconda3-latest-Linux-x86_64.sh

# 因為在docker裡面run
export PATH=/root/miniconda3/bin:$PATH

conda create --name mlpipeline python=3.7
conda activate mlpipeline

pip install https://storage.googleapis.com/ml-pipeline/release/latest/kfp.tar.gz --upgrade

建立pipeline.zip#

回到文件,開始建立pipeline.zip

1
2
3
4
5
6
7
8
9
10
11
12
13
14
15
16
17
18
19
20
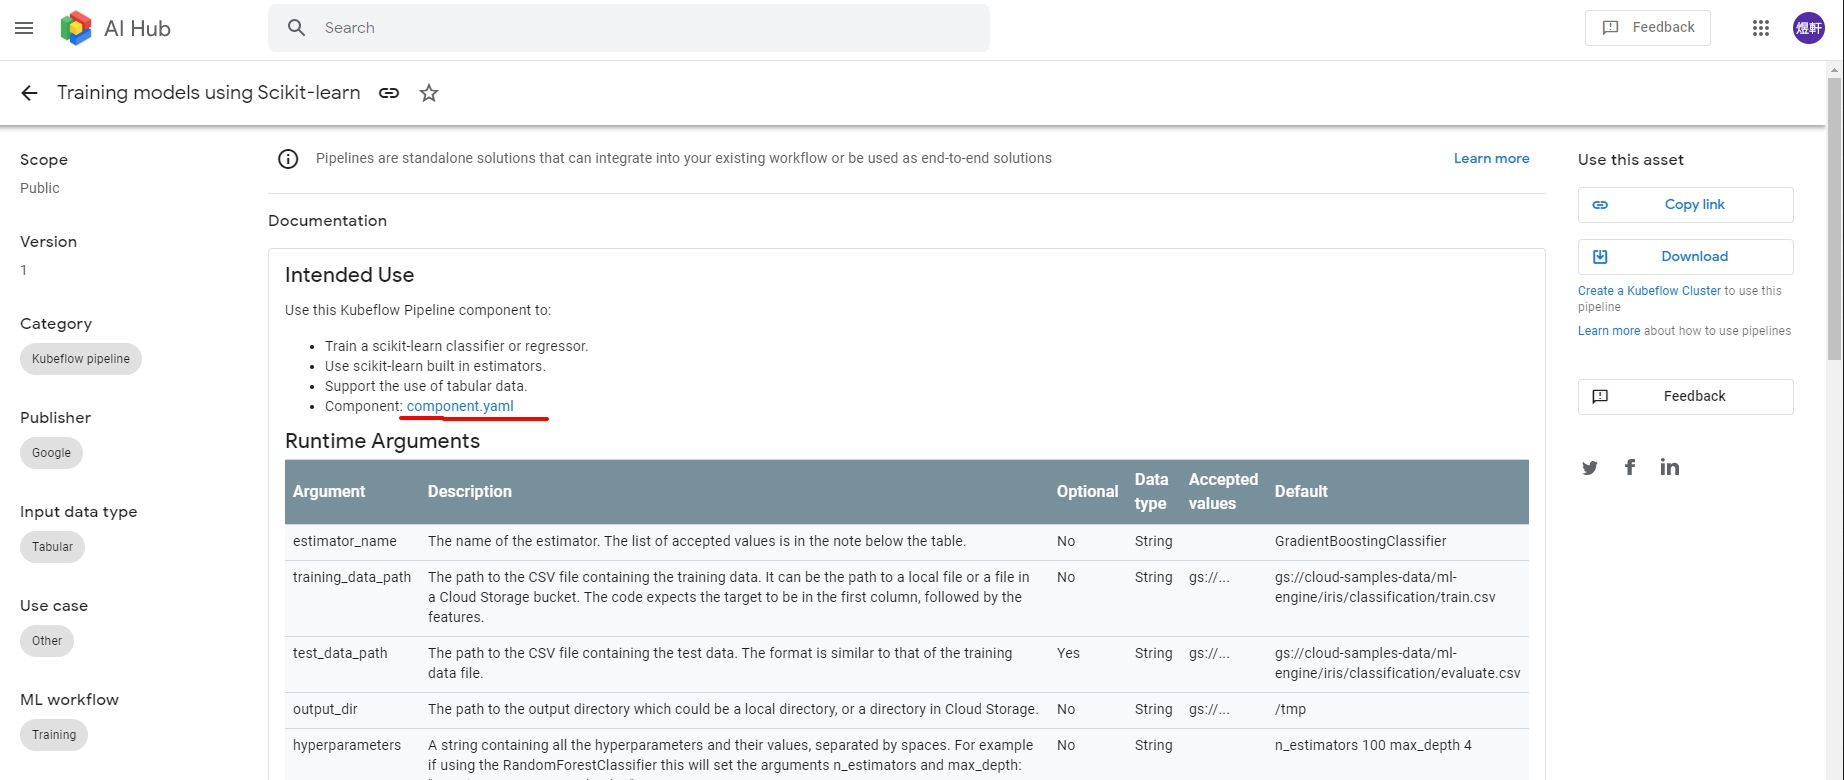
from kfp import compiler
import kfp.dsl as dsl
import kfp.components as comp

scikit_learn_train = comp.load_component_from_file('component.yaml')
@dsl.pipeline(
name='Scikit-learn Trainer',
description='Trains a Scikit-learn model')
# Use a function to define the pipeline.
def scikit_learn_trainer(
training_data_path='gs://cloud-samples-data/ml-engine/iris/classification/train.csv',
test_data_path='gs://cloud-samples-data/ml-engine/iris/classification/evaluate.csv',
output_dir='/tmp',
estimator_name='GradientBoostingClassifier',
hyperparameters='n_estimators 100 max_depth 4'):

# Use the component you loaded in the previous step to create a pipeline task.
sklearn_op = scikit_learn_train(training_data_path, test_data_path, output_dir,
estimator_name, hyperparameters)
compiler.Compiler().compile(scikit_learn_trainer, './pipeline.zip')
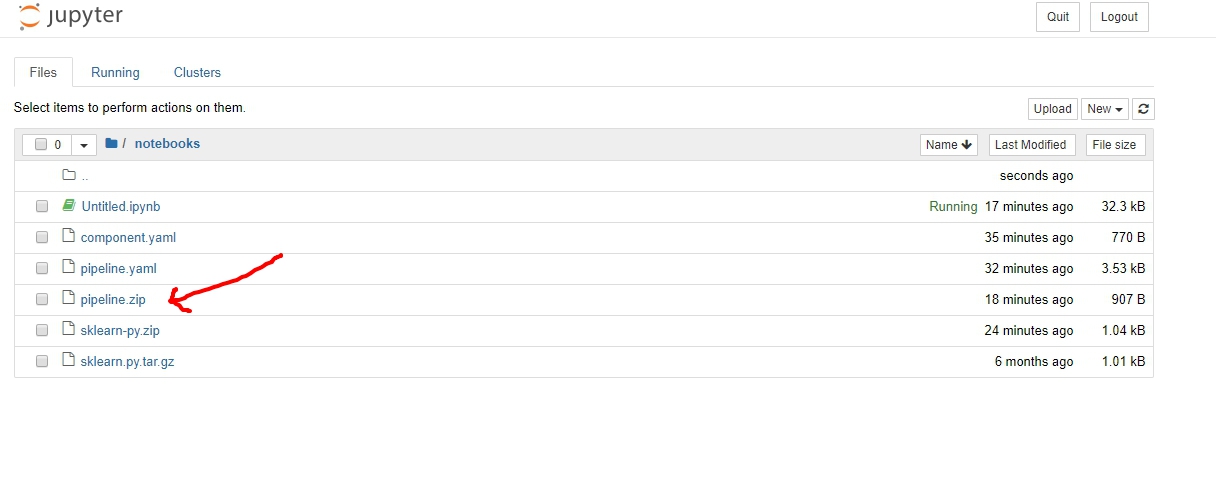
接著呢,就可以看到產生的pipeline.zip了。
pipeline
可以看出來,這邊我們用別人提供的pipeline,建立自己要用的pipeline.zip,接著就可以透過kubeflow pipeline上傳、測試,大大節省了很多步驟,也就是plug-and-play AI components

OK,今天的文章就到這邊,謝謝大家的觀看。