· Joseph · AI & Machine Learning · 3 min read
[Day 19] Google Cloud Text-to-Speech - 2
昨天玩完Cloud Text-to-Speech demo以後,大概知道他可以把文字轉成語音念給你聽。今天就來入門Cloud Text-to-Speech API吧。
前情提要:記得先Enable API,放置環境變數的教學可以看這系列第三天的文章 語言一樣使用Golang,然後跑在docker裡,之後也會放上github
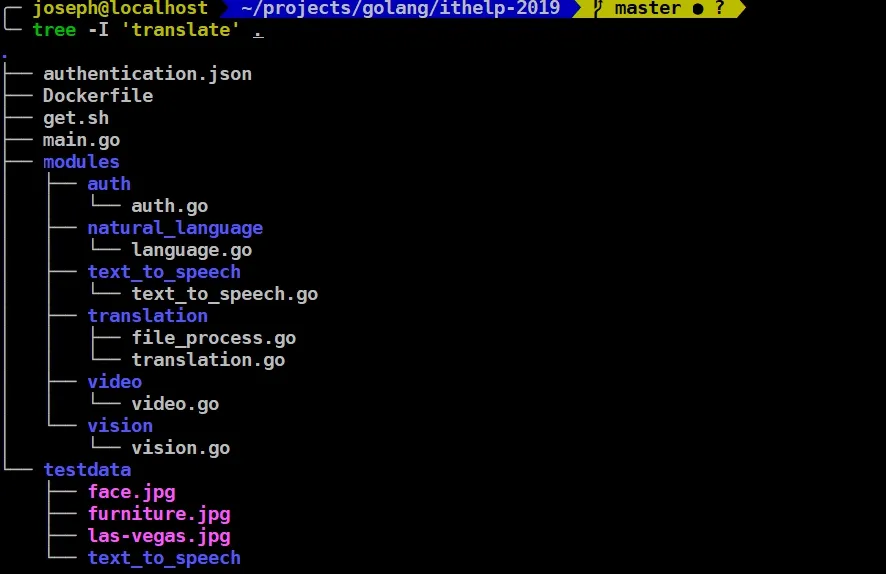
這邊因為需要output一個檔案,但在docker裡面不好直接拿出來,所以在run的時候使用了-v mount,先來看一下檔案目錄: 
我這邊就會Mount testdata/text_to_speech到docker,指令如下
docker run -v ${PWD}/testdata:/app/testdata -it golang ./app Day19
好,現在來看看code吧:
package text_to_speech

import (
  "context"
  "fmt"
  "io/ioutil"
  "log"

  texttospeech "cloud.google.com/go/texttospeech/apiv1"
  texttospeechpb "google.golang.org/genproto/googleapis/cloud/texttospeech/v1"
)

func ConvertToSpeech(text string) {
  var root string = "./testdata/text_to_speech"
  // Instantiates a client.
  ctx := context.Background()

  client, err := texttospeech.NewClient(ctx)
  if err != nil {
    log.Fatal(err)
  }

  // Perform the text-to-speech request on the text input with the selected
  // voice parameters and audio file type.
  req := texttospeechpb.SynthesizeSpeechRequest{
    // Set the text input to be synthesized.
    Input: &texttospeechpb.SynthesisInput{
      InputSource: &texttospeechpb.SynthesisInput_Text{Text: text},
    },
    // Build the voice request, select the language code ("en-US") and the SSML
    // voice gender ("neutral").
    Voice: &texttospeechpb.VoiceSelectionParams{
      LanguageCode: "en-US",
      SsmlGender:   texttospeechpb.SsmlVoiceGender_NEUTRAL,
    },
    // Select the type of audio file you want returned.
    AudioConfig: &texttospeechpb.AudioConfig{
      AudioEncoding: texttospeechpb.AudioEncoding_MP3,
    },
  }

  resp, err := client.SynthesizeSpeech(ctx, &req)
  if err != nil {
    log.Fatal(err)
  }

  // The resp's AudioContent is binary.
  filename := "output.mp3"
  err = ioutil.WriteFile(root+"/"+filename, resp.AudioContent, 0644)
  if err != nil {
    log.Fatal(err)
  }
  fmt.Printf("Audio content written to file: %v\n", filename)
}中間有一個AudioConfig這是可以注意一下的地方,在文件裡她有很多參數可以設定:
- AudioEncoding:選擇輸出格式
- EffectsProfileId:按照這邊的說明,他能為不同Device所產生的output做優化。
- Pitch、SampleRateHertz、SpeakingRate、VolumeGainDb:都是一些在音訊領域常用到的常數
- ForceSendFields、NullFields:使用在Patch request,可以修改一些default的API request fields。
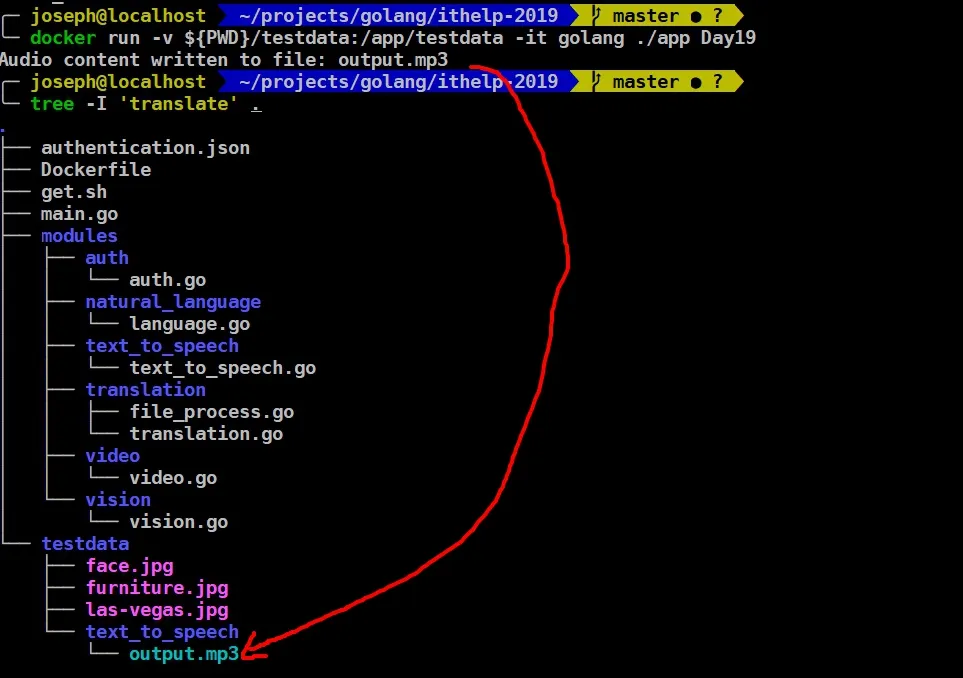
好,我們就來看看output吧。  多了一個
多了一個output.mp3。我只能讓你們看的到,要聽的話自己操作看看吧~
OK,今天的文章就到這邊,謝謝你的觀看。
今天的github:https://github.com/josephMG/ithelp-2019/tree/Day-19