部落格搬家後,我用 AI Agent 自動把 109 篇舊文塞進 Google Search Console
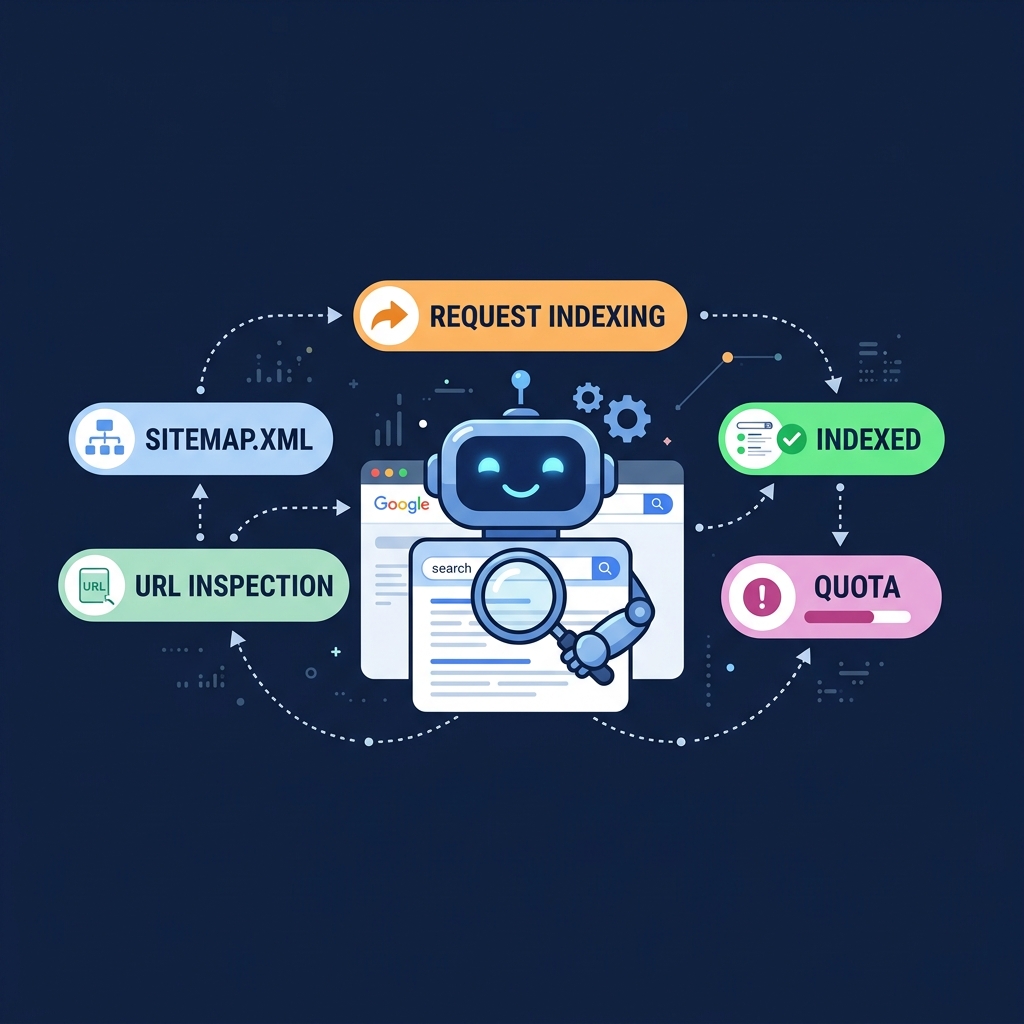
前言 最近把部落格從 Hexo 遷移到 Astro,重新整理了 Sitemap。然而,網址結構和路由變更後,最讓人頭痛的就是 SEO 的銜接問題。為了讓 Google 爬蟲以最快速度更新索引,我需要將 Sitemap 裡全部 109 篇部落格文章 一個個輸入到 Google Search Console (GSC)…
I'm a Fullstack Developer passionate about System Design, DevOps, and AI. I enjoy building side projects and sharing insights on algorithms and GenAI through my blog.
前言 最近把部落格從 Hexo 遷移到 Astro,重新整理了 Sitemap。然而,網址結構和路由變更後,最讓人頭痛的就是 SEO 的銜接問題。為了讓 Google 爬蟲以最快速度更新索引,我需要將 Sitemap 裡全部 109 篇部落格文章 一個個輸入到 Google Search Console (GSC)…
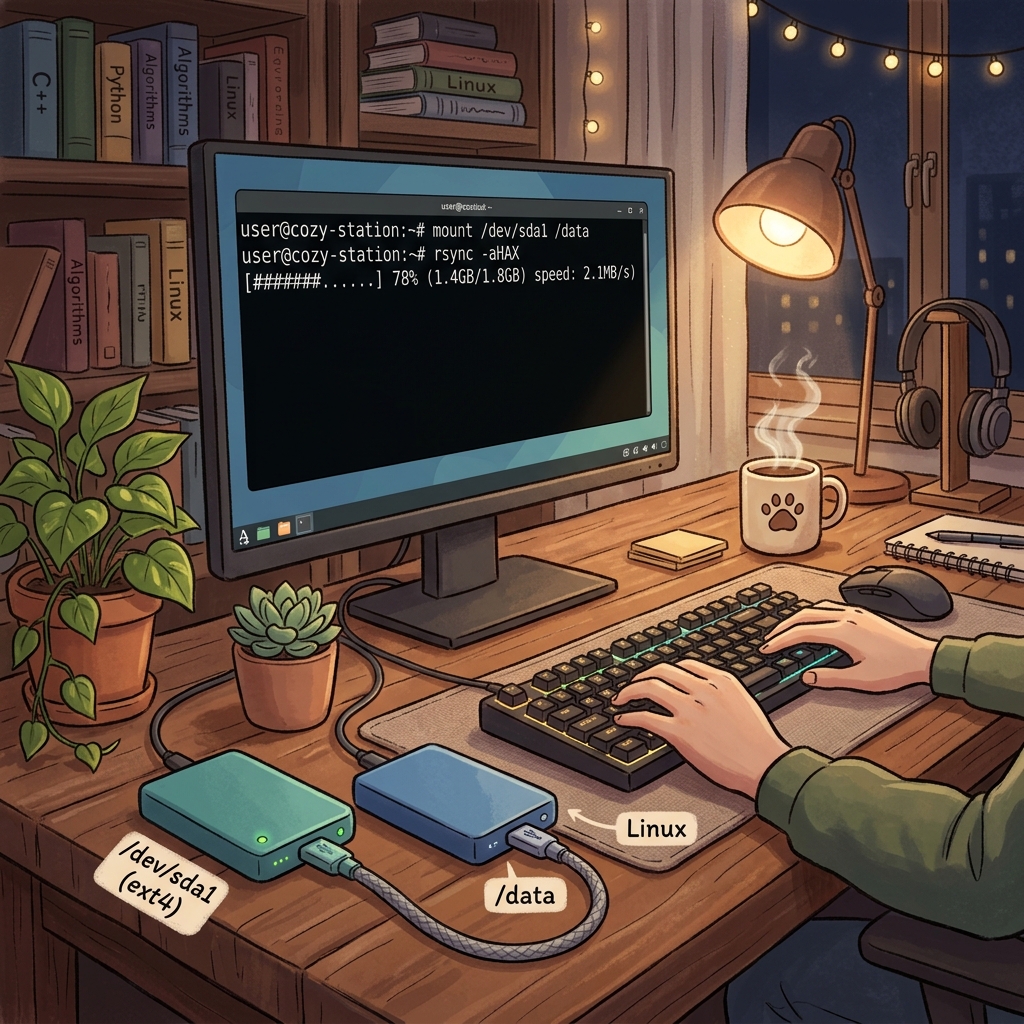
當系統根目錄()空間快滿時,常見做法是加一顆新硬碟,把吃空間的資料(資料庫、容器 volume、image…)放到新盤的 。本文示範如何把一顆全新硬碟格式化、掛載成 ,並把原本 裡的資料完整搬過去而不遺失。
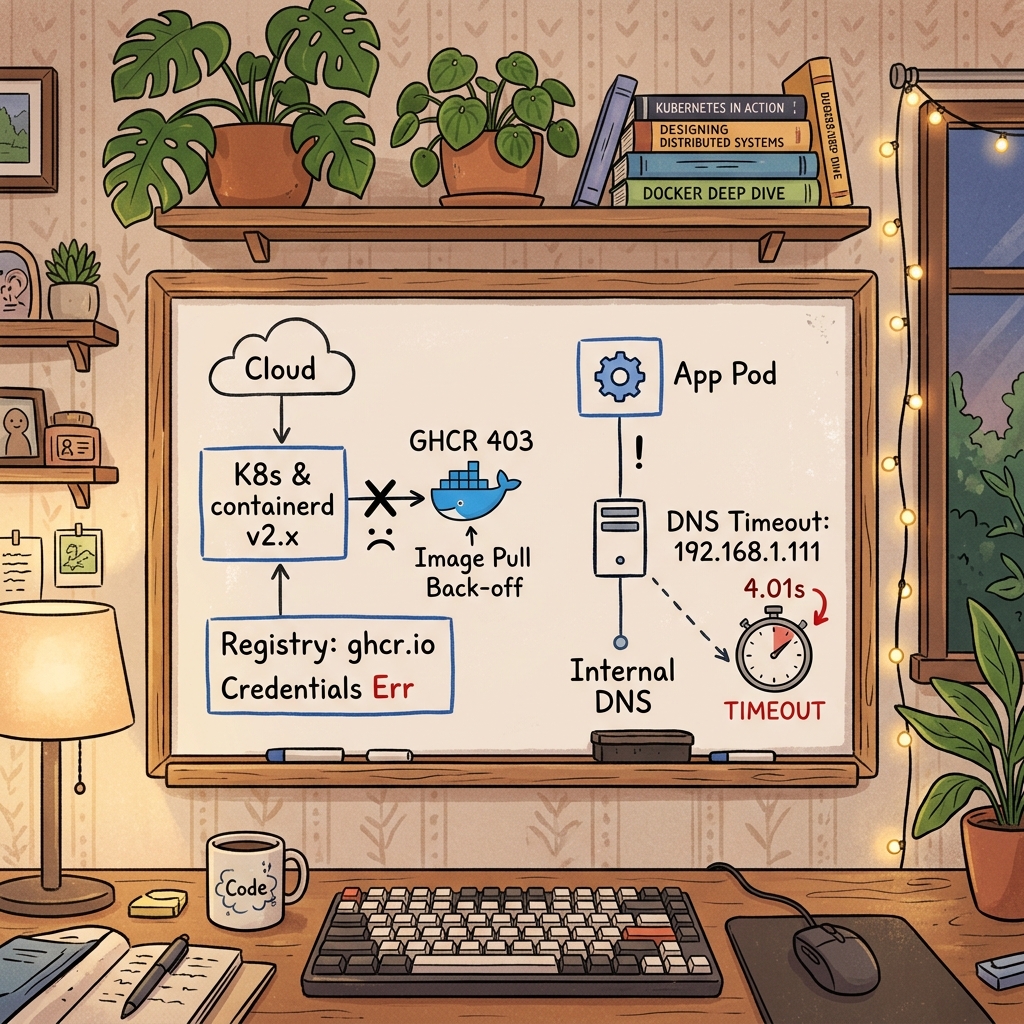
前言 這篇文章記錄了兩個讓我卡了很久的網路問題,分別發生在不同的場景: 第一場**:k3s 升級後,所有 GHCR image 無法拉取, 設了認證卻像沒設一樣 第二場**:FastAPI 服務間歇性 502,改了三輪程式碼,最後發現是一台早就死掉的 DNS 伺服器 兩件事有同一個共同點:問題出在基礎設施的底層,但我…
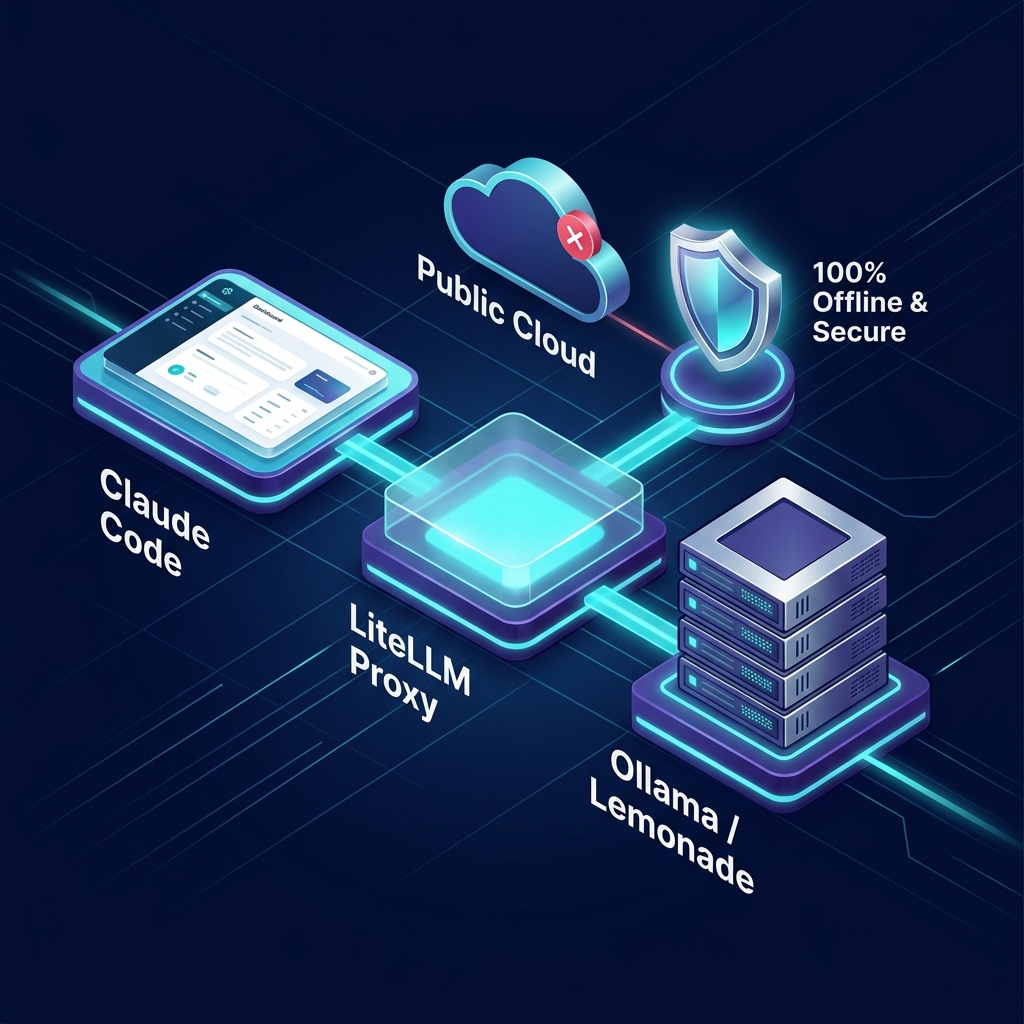
Claude Code 是 Anthropic 推出的強大命令列 AI 助手,預設會連接到 Anthropic 的雲端 API。然而,如果你身處高安全性內網環境、無網路的教學現場,或者想節省 API 費用,那麼將 Claude Code 橋接到本地運行的大型語言模型(LLM)是一個非常理想的解決方案。 本文將詳細說明…