· Joseph · Web3  · 4 min read

Hardhat - Solidity and NFT - Part 1 - Prepare project
農曆年前結束了一個博弈業的案子,開啟了虛擬貨幣及區塊鏈的契機。年後,整個2月都在研究區塊鏈的各種應用,NFT、opensea、solidity、hardhat、ipfs、testnet,今天這篇文章來記錄一下我用Solidity / Hardhat上架NFT的過程,以免以後金魚腦忘光。

Prerequisite: Sign-up these services.
Etherscan (這個服務是之後用來verify contract用的,如果不想驗證可以跳過申請。)
Metamask
Infura
NFTStorage

Init project

我是使用docker, docker-compose,所以先來看看我的初始專案架構及docker-compose.yml跟Dockerfile。
Init project

docker-compose.yml
version: '3'

services:
  hardhat:
    build:
      context: ./hardhat
      dockerfile: Dockerfile.dev
    volumes:
      ./hardhat:/app
      /app/node_modules
    ports:
      8545:8545

農曆年前結束了一個博弈業的案子,開啟了虛擬貨幣及區塊鏈的契機。年後,整個2月都在研究區塊鏈的各種應用,NFT、opensea、solidity、hardhat、ipfs、testnet,今天這篇文章來記錄一下我用Solidity / Hardhat上架NFT的過程,以免以後金魚腦忘光。

Prerequisite: Sign-up these services.

Init project

我是使用docker, docker-compose,所以先來看看我的初始專案架構及docker-compose.ymlDockerfileInit project

docker-compose.yml

version: '3'

services:
  hardhat:
    build:
      context: ./hardhat
      dockerfile: Dockerfile.dev
    volumes:
      - ./hardhat:/app
      - /app/node_modules
    ports:
      - 8545:8545

hardhat/Dockerfile.dev

FROM node:16

ENV APP_ROOT /app

RUN mkdir ${APP_ROOT}
WORKDIR ${APP_ROOT}
ADD . ${APP_ROOT}

RUN yarn install
RUN yarn global add \
  solhint \
  solc \
  eslint \
  typescript

EXPOSE 8545

CMD [ "yarn", "dev" ]

接下來,用npx建立一個新的hardhat專案: init hardhat

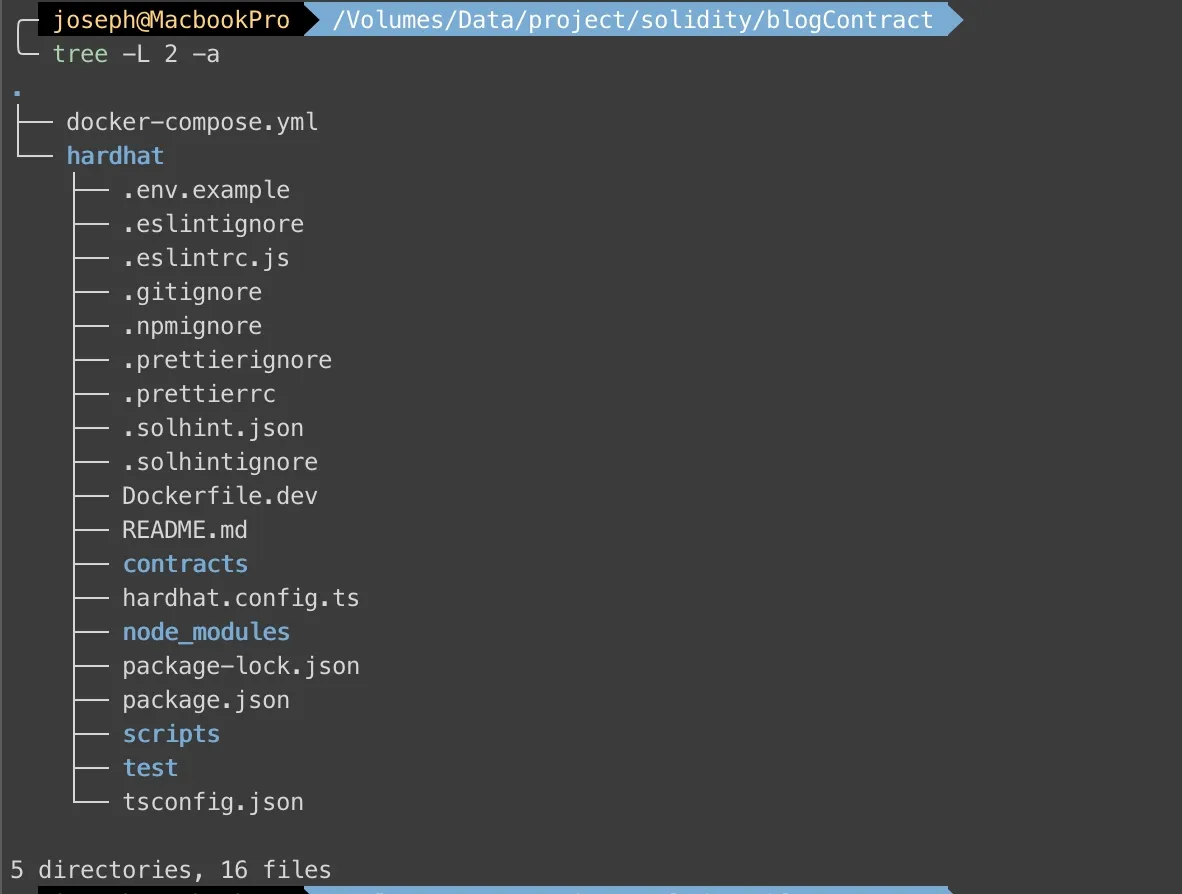
都完成以後,就可以看到我們的專案架構了。 project structure

Settings

我們前面申請過 MetamaskInfuraEtherscan,現在把相關參數設定到.env裡

PRIVATE_KEY=YOUR_METAMASK_PRIVATE_KEY
INFURA_ID=
RINKEBY_URL=
ETHERSCAN_API_KEY=
NFT_CONTRACT_ADDRESS=YOUR_CONTRACT_ADDRESS
Metamask private key (PRIVATE_KEY)

在你申請完錢包以後,可以在Chrome extension裡找到Account details metamask key
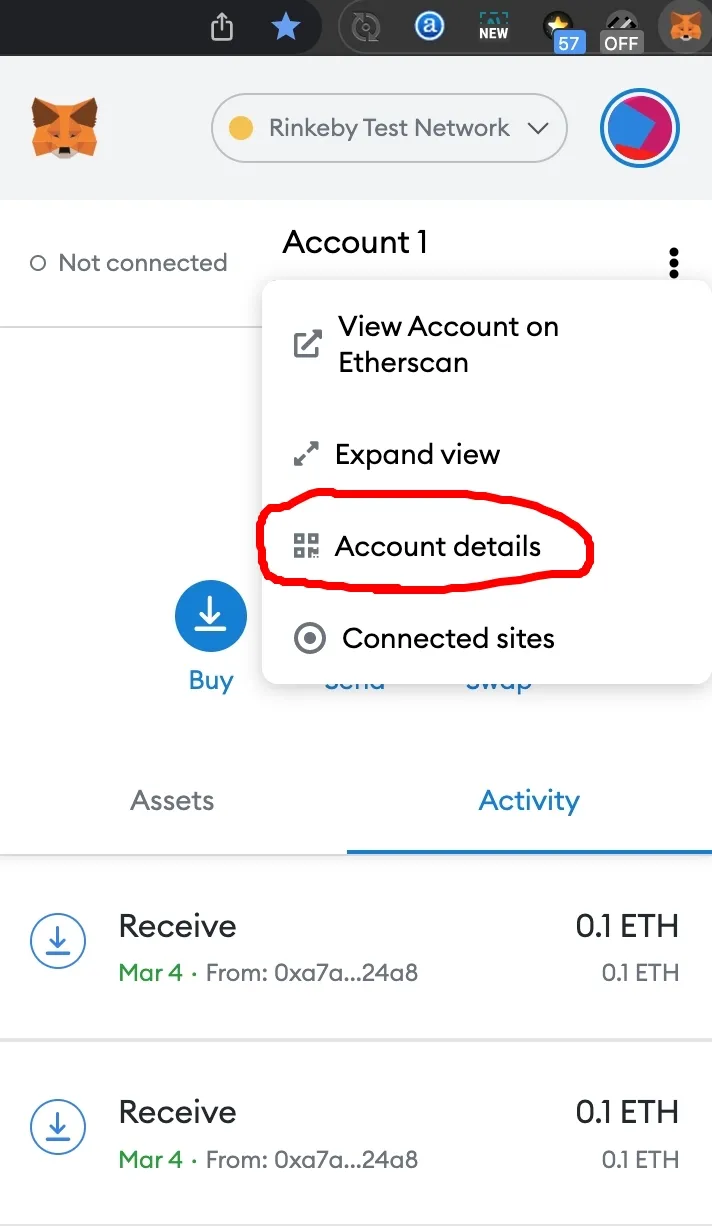
記得先選測試網路 rinkeby test network,測試網路的eth可以在這邊申請: https://faucet.rinkeby.io/

注意這個key不要外流,否則你的metamask錢包可能會不安全。

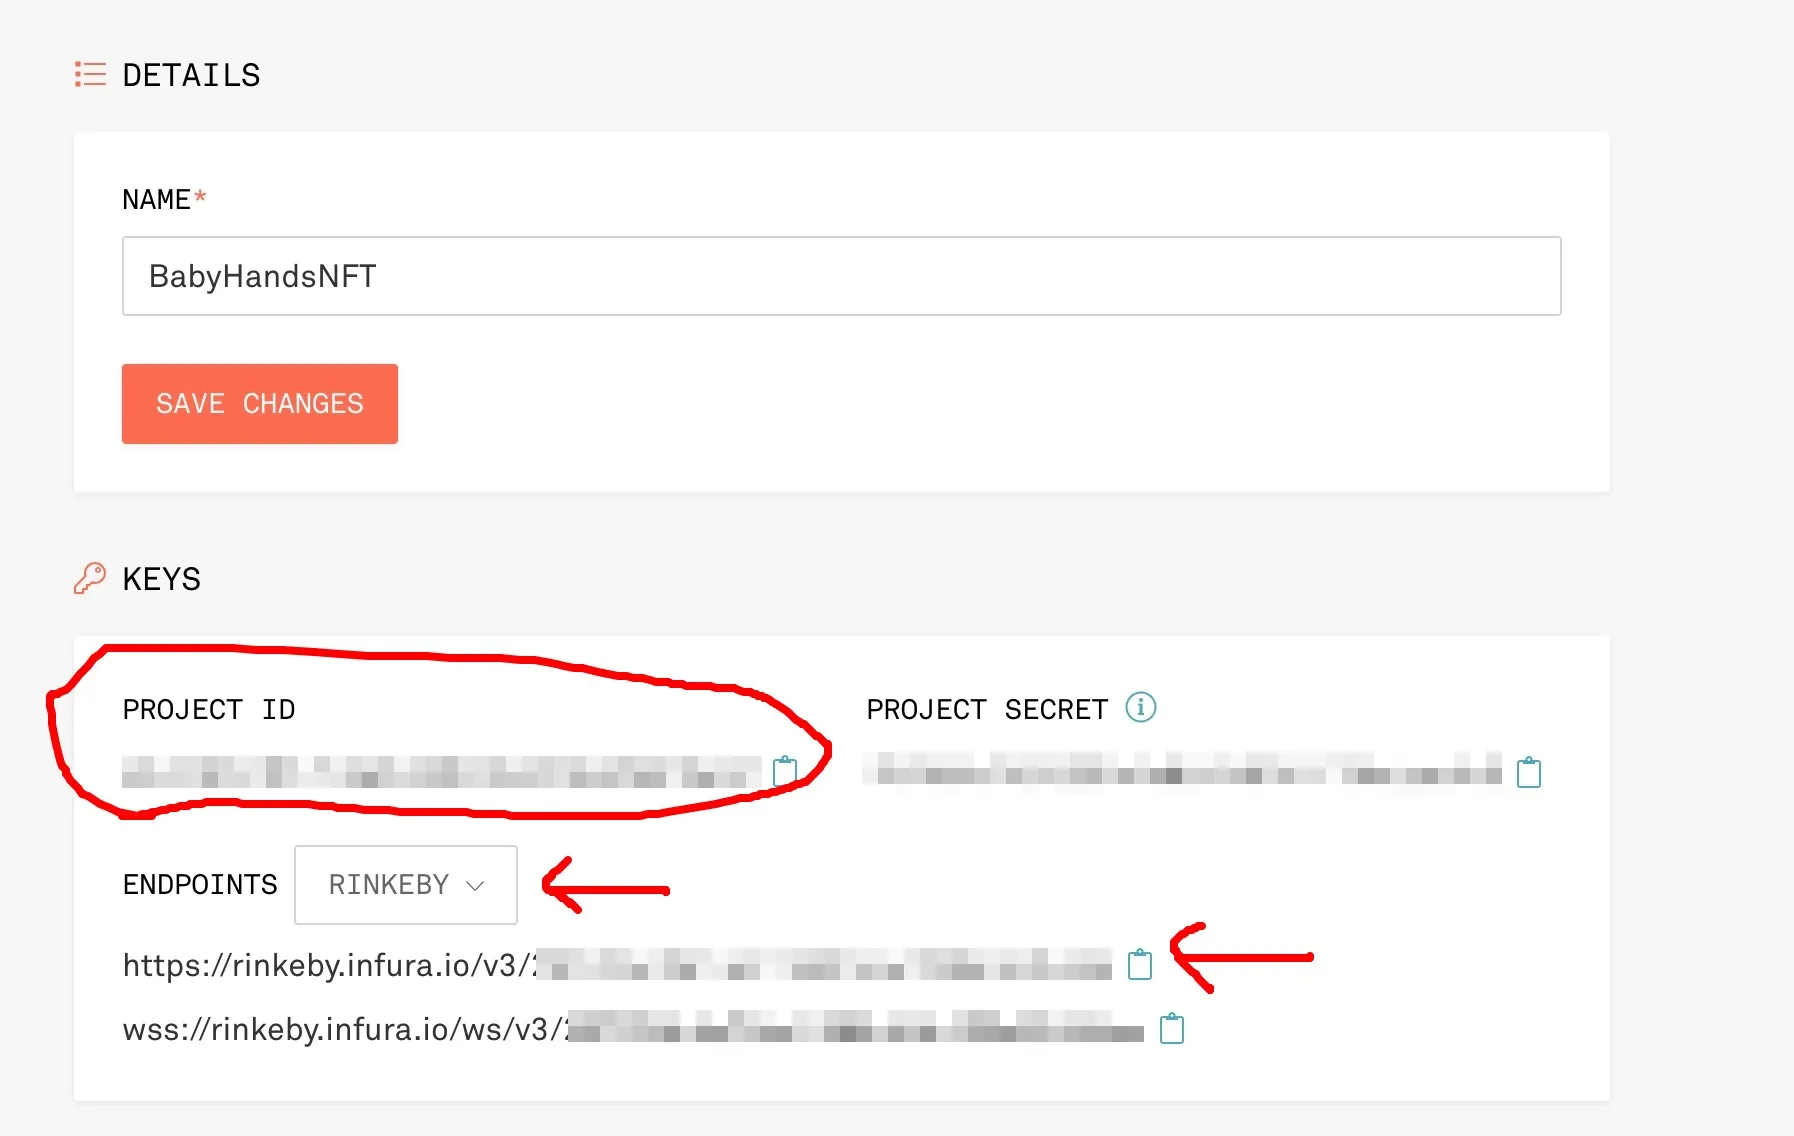
Infura id and url (INFURA_ID, RINKEBY_URL)

先建立Infura project以後,進到setting就可以找到id and url了 infura create project infura ENV

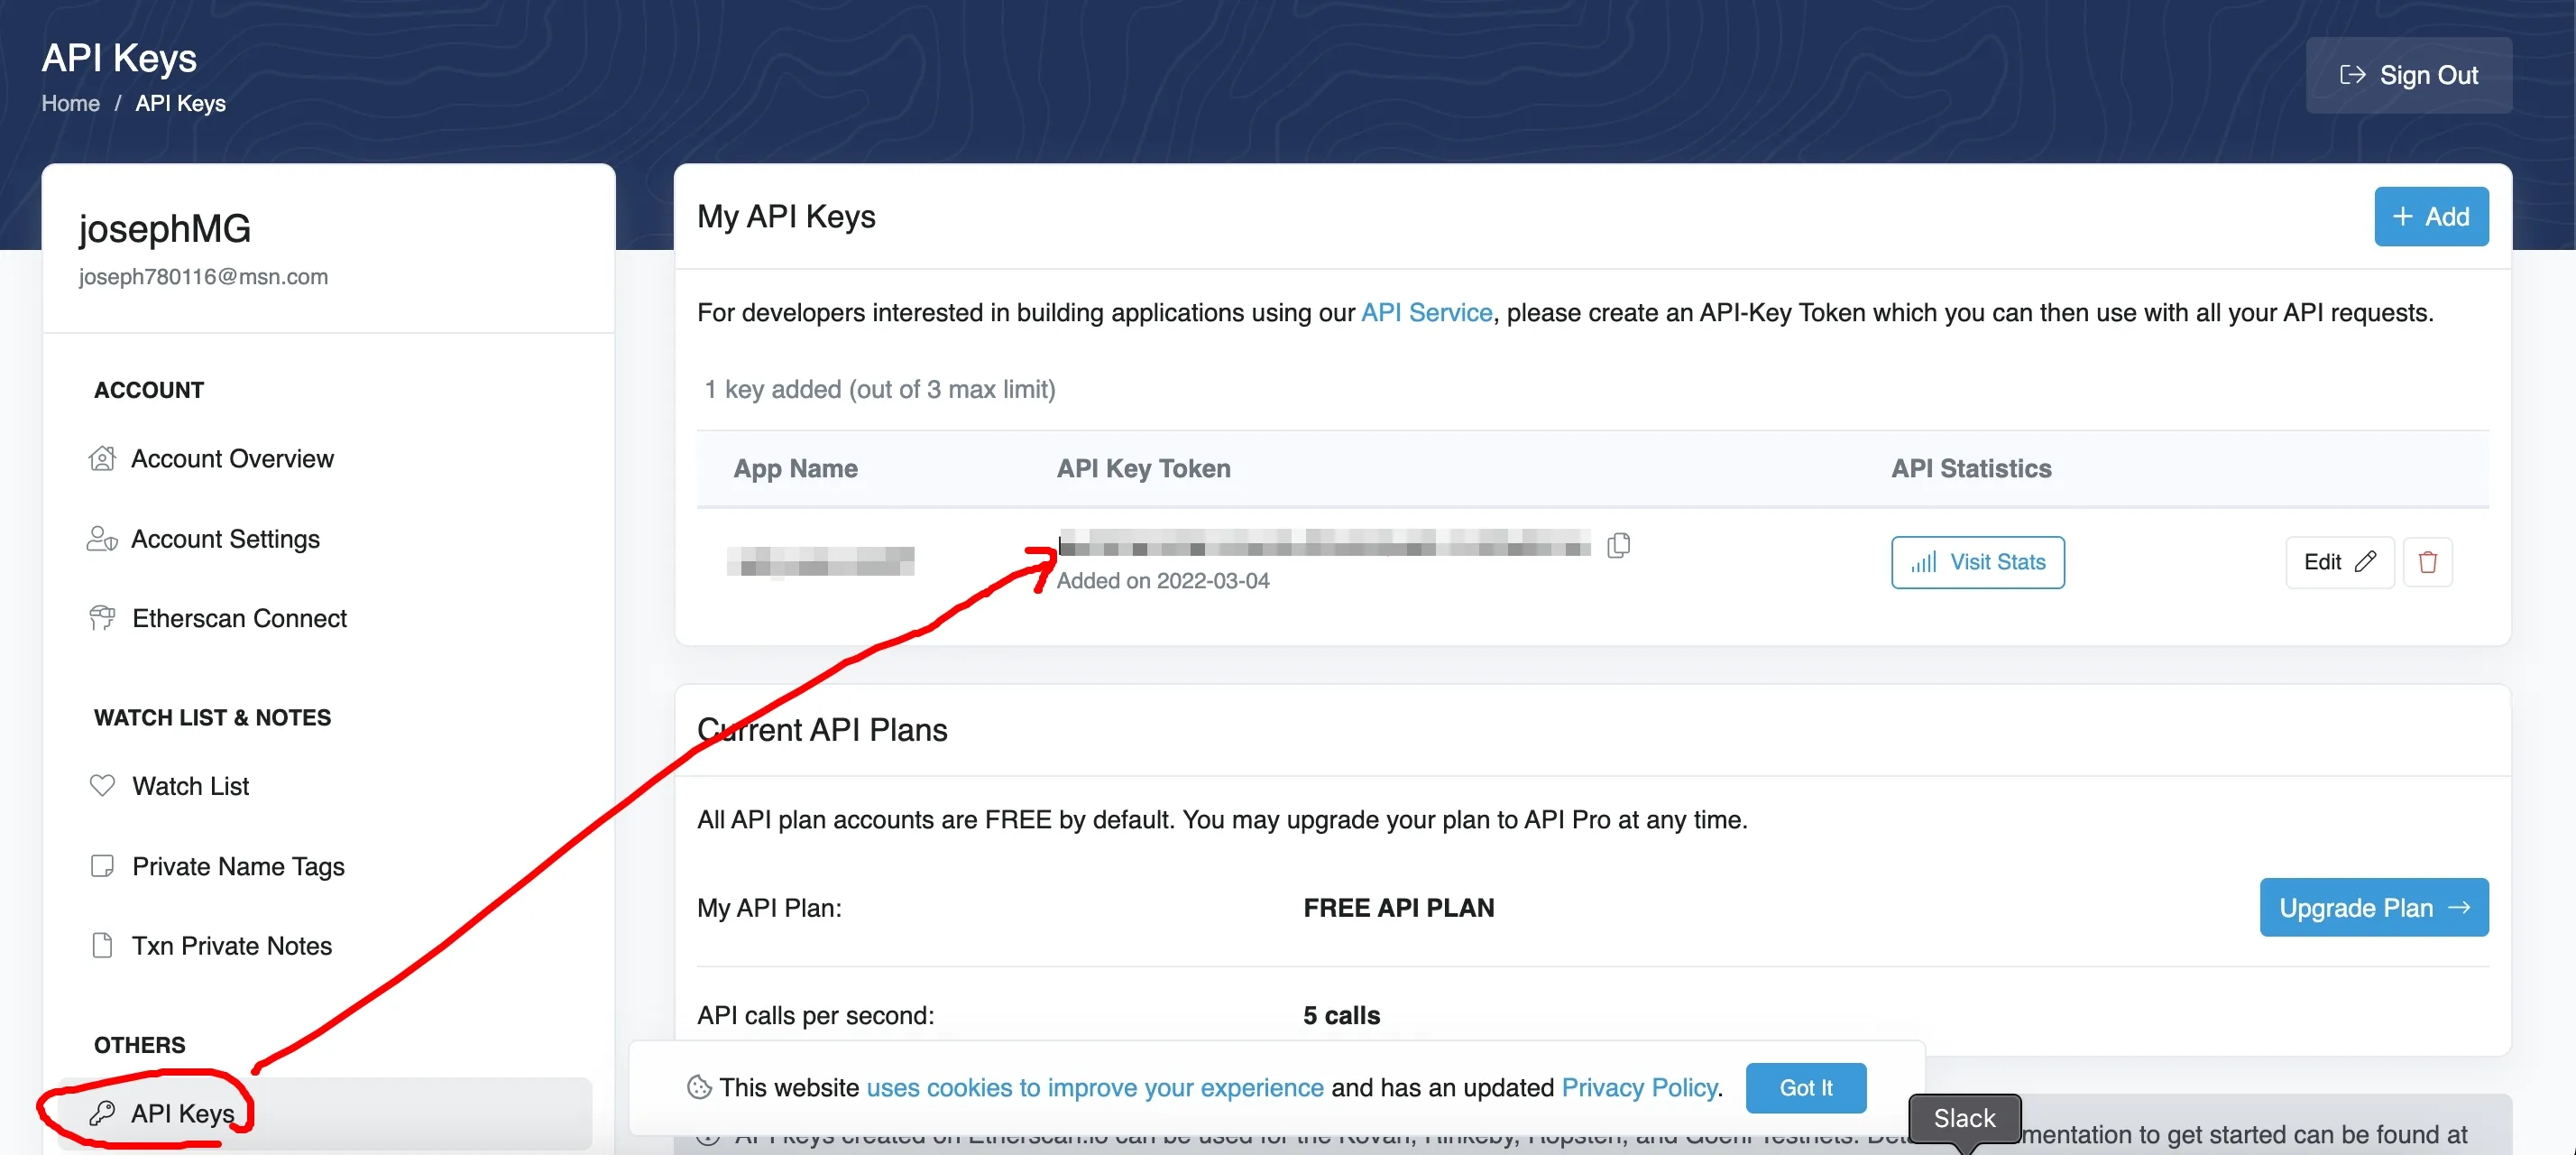
Etherscan (ETHERSCAN_API_KEY)

Profile裡Add Key以後就有個API Key可以使用了。 etherscan api key

參數設定到這邊告一個段落,NFT_CONTRACT_ADDRESS之後deploy才會有,然後我們稍微修改一下hardhat.config.ts,把預設的測試網路設定改掉。

import * as dotenv from "dotenv";

import { HardhatUserConfig } from "hardhat/config";
import "@nomiclabs/hardhat-etherscan";
import "@nomiclabs/hardhat-waffle";
import "@typechain/hardhat";
import "hardhat-gas-reporter";
import "solidity-coverage";

dotenv.config();

// You need to export an object to set up your config
// Go to https://hardhat.org/config/ to learn more

const config: HardhatUserConfig = {
  solidity: "0.8.4",
  networks: {
    rinkeby: {
      url: process.env.RINKEBY_URL || "",
      accounts:
        process.env.PRIVATE_KEY !== undefined ? [process.env.PRIVATE_KEY] : [],
    },
  },
  gasReporter: {
    enabled: process.env.REPORT_GAS !== undefined,
    currency: "USD",
  },
  etherscan: {
    apiKey: {
      rinkeby: process.env.ETHERSCAN_API_KEY,
    },
  },
};

export default config;

到這邊我們可以試試看能不能跑起docker,先加上scripts在package.json裡:

{
  "name": "hardhat-project",
  "scripts": {
    "dev": "hardhat node --network hardhat",
    "console": "hardhat console",
    "test": "hardhat test --network hardhat",
    "compile": "hardhat compile",
    "rinkeby:deploy": "hardhat --network rinkeby deploy --export-all tmp/contracts/manifest.json",
    "mainnet:deploy": "hardhat --network mainnet deploy --export-all tmp/contracts/manifest.json"
  },
  "devDependencies": {
    ...
    ...
    ...
  }

有了scripts以後,我們就可以docker-compose up了。 docker first run

好囉,看到上面的圖就正常了,這一篇就先到這邊,我們下一篇要開始上架NFT還有部署contract了。

Back to Blog

Related Posts

View All Posts »
Hardhat - Solidity and NFT - Part 2 - Deploy contract and Mint NFT

Hardhat - Solidity and NFT - Part 2 - Deploy contract and Mint NFT

我們上一篇已經設定好docker及hardhat專案,這一篇就從NFT開始。 Generate NFT metadata 先建立一個images資料夾後,把你想要的圖片放進去,並存成1, 2, 3....之類的檔名,然後用ipfs-car指令打包在一起。 找不到圖可以先用opensea doc裡的圖當練習 ipfs-car 接著到NFT Storage上傳images.car檔案就可以了。 image-car-upload

Blockchain fullstack structure - Part 4 - React.js and Next.js

Blockchain fullstack structure - Part 4 - React.js and Next.js

Alright, the series of articles goes to frontend part. I post an article related to Blockchain with React.js and Next.js. If you haven't seen my previous posts Part 1 Introduction, Part 2 Hardhat, and Part 3 Golang Gin, please read them first. In this article, I demonstrate how to use React.js (Next.js) to interact with smart contract by Golang Gin API and hardhat RPC URL, and implement a simple Sign-in with Ethereum (SIWE) authentication and setGreeting to Solidity. Okay, let's start it. TOC

Blockchain fullstack structure - Part 3 - Golang Gin

Blockchain fullstack structure - Part 3 - Golang Gin

It's time to Blockchain with Golang. If you haven't seen my previous post Part 1 Introduction and Part 2 Hardhat, please read them first. Again, does Dapp need a Backend? reddit - You can pretty much make a dapp without backend, but there are some things that can't be done with a smart contract. - You need a backend among other reasons for off-chain or metadata that won’t be stored in the smart contracts. Have you ever thought about how Moralis works? Off-chain: Backend infrastructure that collects data from the blockchain, offers an API to clients like web apps and mobile apps, indexes the blockchain, provides real-time alerts, coordinates events that are happening on different chains, handles the user life-cycle and so much more. Moralis Dapp is used in order to speed up the implementation of the off-chain infrastructure. Moralis Dapp is a bundled solution of all the features most Dapps need in order to get going as soon as possible.

Blockchain fullstack structure - Part 2 - Hardhat

Blockchain fullstack structure - Part 2 - Hardhat

This is a series articles of Blockchain fullstack structure, please read Part 1 Introduction first. In this part, I will show how to set docker to Hardhat, but this is simpler than my previous article Hardhat Solidity NFT tutorial.